REVIEW · FUNCHAL
Fishing Villages – Southwest Tour
Book on Viator →Operated by Madeira Island Tours · Bookable on Viator
Madeira’s southwest villages feel like a postcard run on real time. This Fishing Villages – Southwest Tour strings together small coastal communities with sea views, cliff towns, and a few cultural detours that don’t feel rushed.
Two things I really like about this day: hotel pickup (from Funchal and nearby areas) makes it low-effort, and the stops are short but meaningful, so you see a lot of coastline without committing to long hikes.
One thing to plan around: the day runs about 8 hours on paper, but timing can be shorter depending on how the route and pacing work out, and lunch isn’t included.
In This Review
- Key Highlights to Look For
- Southwest Madeira in One Day: What This Tour Is Really Like
- Pickup in Funchal and the 5-Minute Waiting Rule
- The Route: From Ponta do Sol to Calheta (Stop by Stop)
- Stop 1: Ponta do Sol – The Sunnier Side of Madeira
- Stop 2: Prazeres – Basalt Houses and Church Towers
- Stop 3: Ponta do Pargo – Lighthouse Views at Madeira’s Western Edge
- Stop 4: Paul do Mar – Salt Factory History and the Sea Wall Change
- Stop 5: Jardim do Mar – A Marine Promenade and Surf Country
- Stop 6: Calheta – Valley Town, Artificial Sand, Leisure Vibes
- How Long Is It Really? Timing That May Run Short
- The Lunch Gap: What You Need to Plan
- Value for Money: Why This Price Makes Sense
- Weather Matters (A Lot)
- Who This Tour Fits Best
- A Note on Guides and the Extra Details
- Should You Book This Fishing Villages – Southwest Tour?
- FAQ
- What time does the tour start?
- Where do you meet for pickup?
- Is hotel pickup included?
- Is lunch included?
- How long is the tour?
- What language is the tour offered in?
- What happens if the weather is bad?
Key Highlights to Look For
- Southwest coastal variety: you get both cliff-top lighthouses and ocean-facing promenades
- Free entry at each village stop: no paid attractions to add up during the day
- English-speaking guides and a small group limit (up to 14 people) for a more personal flow
- Scenic, quick stops: ideal if you want photos and context without a full-day walking tour
- A practical rhythm: drive, park, stroll, and move on—built for sightseeing efficiency
Southwest Madeira in One Day: What This Tour Is Really Like
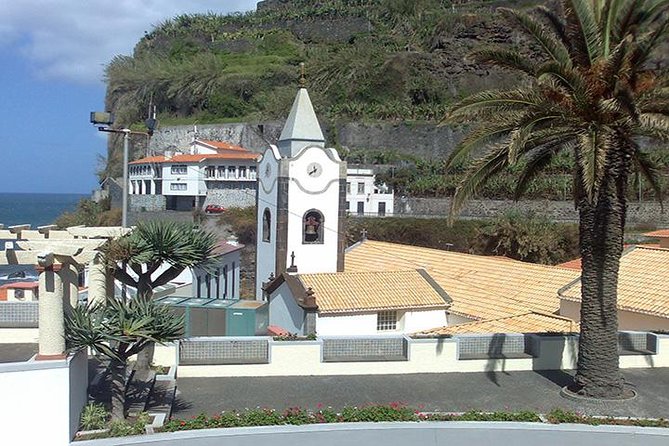
This is a classic Madeira “see the coast” format: you start in Funchal, hop into an air-conditioned vehicle, and spend the day bouncing between several southwest towns. Each stop is designed for a short walk and a few photos, with just enough time to pick up the mood of the place—fishing village, agricultural pocket, or cliff-side view point.
What makes the plan work is the mix. You’re not just doing one type of scenery. You swing from Ponta do Sol (the island’s sunnier-feeling pocket) to the far-west Ponta do Pargo lighthouse area, then down through Paul do Mar, Jardim do Mar, and Calheta.
The vibe is also family-friendly. The tour description says most people can participate, and the actual schedule is built around short transfers and compact village strolls rather than long, strenuous routes. If you want variety without the stress of arranging bus connections or parking, this is a strong match.
You can also read our reviews of more tours and experiences in Funchal.
Pickup in Funchal and the 5-Minute Waiting Rule
If you’re staying around Funchal, Caniço, or nearby areas like Câmara de Lobos, the pickup setup is one of the biggest conveniences. You meet at your hotel reception if possible, or outside by the main entrance if you’re in an apartment/villa.
A couple of practical points matter here:
- You’ll want to check your email/WhatsApp the day before for the exact pickup time and location.
- The driver will wait no longer than 5 minutes after the scheduled pickup time.
That 5-minute window is the difference between a smooth morning and a stressful one. Set an alarm early, be ready a little before the time shown, and keep your phone handy.
The tour uses a mobile ticket, and it’s offered in English. There’s also a hotel drop-off back in the same zones, so you’re not left figuring out last-mile transportation afterward.
The Route: From Ponta do Sol to Calheta (Stop by Stop)
The day begins at 8:30 am. From there, the itinerary moves along the south and southwest side of Madeira, with six village stops. Each one is listed at about 30 minutes, which tells you the pacing right away: this is a “brief but useful” sampling, not a long wandering day.
Stop 1: Ponta do Sol – The Sunnier Side of Madeira
Your first village stop is Ponta do Sol, often described as the island’s sunniest spot, and the name itself hints at a sunny point. This is a small, quiet settlement built into a steep valley, with banana plantations draping the surrounding slopes.
In just half an hour, you can usually get a feel for the village shape: steep terrain, sea-adjacent paths, and a calmer pace than bigger towns. If you like photos with depth—houses stepping down a hillside—you’ll do well here.
Consideration: 30 minutes sounds short, but Ponta do Sol is more about atmosphere than big-ticket sights. If you’re hoping for a museum-level stop, this won’t be that kind of visit.
Stop 2: Prazeres – Basalt Houses and Church Towers
After lunch (more on that later), the route heads to Prazeres. This is a small agricultural settlement centered around a church, and the striking thing here is scale: the church towers can look oversized compared to the village around them.
Another detail that makes this stop interesting is the building style. Around Prazeres you’ll see older one-room houses made from dark basalt, often with unplastered walls. That kind of texture is hard to fake on a photo—this is the sort of stop where you’ll notice the material and the way people shaped homes around the land.
Consideration: if you’re not into architectural details or quiet countryside pauses, you may find yourself wanting more time. The benefit is you still keep a full-coast itinerary.
Stop 3: Ponta do Pargo – Lighthouse Views at Madeira’s Western Edge
Next is the far-west tip: Ponta do Pargo. Here you get a cliff-top lighthouse sitting about 312 meters above the sea. The village is named after dolphin fish (not dolphins)—which is a very Madeira way of naming places based on what’s fished locally.
The main pull is the view quality. You’re at the extreme end, so you get that open-coast feeling. It’s also surrounded by fields of vines and vegetables, which adds a farming layer to the scenery.
Consideration: this area can feel more exposed to wind. Wear something that handles coastal breeze, especially if you’re there on a brisk day.
Stop 4: Paul do Mar – Salt Factory History and the Sea Wall Change
Then it’s on to Paul do Mar. This town’s story is tightly tied to the ocean. Historically, parts of the area were affected by seawater flooding, which led to a specific industry: a salt factory was established, and later it was closed.
You’ll also learn about the change brought by a newer higher sea wall and updated ocean-front infrastructure. The flooding from the sea stopped once those changes were in place, along with road and parking improvements.
Why it’s worth the stop: you’re not just looking at buildings—you’re seeing how people adapted to water levels and coast behavior. In 30 minutes you might not unpack everything, but you’ll get the core idea.
Stop 5: Jardim do Mar – A Marine Promenade and Surf Country
Jardim do Mar is one of those towns that’s immediately pleasant. It has a marine promenade that’s ideal for a slow walk and a long look at the coastline.
It’s also known as a surfing center for Madeira. That matters because it shapes what you notice: the open ocean, the way people move around the shoreline, and the general coastal energy.
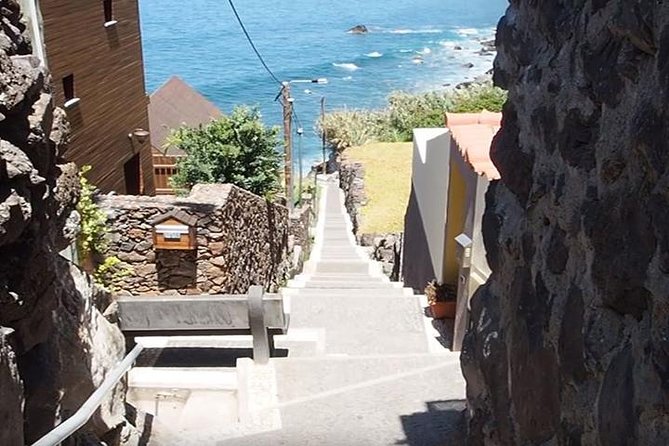
There’s also a fun practical detail: there’s a route up a steep cliff which historically was the only way in and out of the village. Even if you don’t walk it, knowing that fact changes how you view the place.
Consideration: promenades are easier than steep routes, but you still want secure footwear. Madeira surfaces can be slick, especially after moisture.
Stop 6: Calheta – Valley Town, Artificial Sand, Leisure Vibes
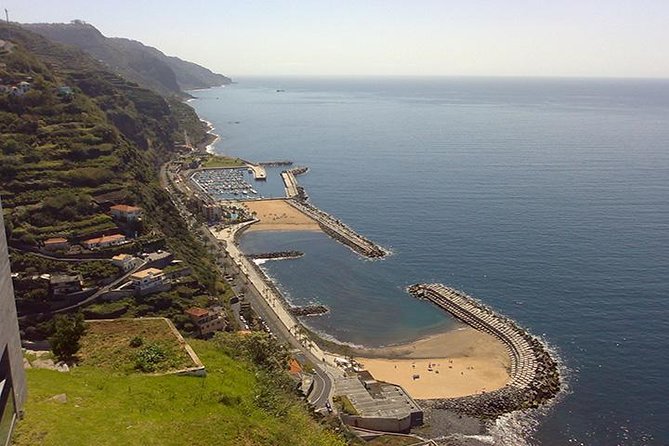
Your final stop is Calheta, set in a steep valley just above the coast. This is described as the main town of Madeira’s southwestern coast, with a fertile, sunlit feel.
Two features define Calheta: the town was built in an inlet near a stream, and it has a more modern artificial sand beach. That combination makes it more of a leisure stop than a purely working fishing village vibe.
If you want one town to end with that feels relaxed and easy to “land in,” Calheta is a good final chapter.
Consideration: since this is the last stop, plan your timing for photos so you don’t feel rushed back to the vehicle.
How Long Is It Really? Timing That May Run Short
The tour is listed as 8 hours (approx.), and the itinerary uses consistent 30-minute village blocks. Still, you should keep a flexible mindset. Some days can run shorter based on drive times, pickup flow, and how the guide manages the schedule.
If your day includes dinner plans with a hard time, don’t set it for right when you expect to be back. Give yourself a buffer. This is especially true if you’re juggling multiple pickup points, since the van needs to organize hotel departures efficiently.
The Lunch Gap: What You Need to Plan
Lunch is not included. That means you’ll either:
- buy something near one of the towns during the midday break, or
- eat before you start and then snack later, or
- bring a simple packed option if the tour timing fits your comfort level.
The key is that “after enjoying lunch” is part of the flow, so the tour expects you to be fed before continuing toward the later stops. If you’re prone to getting grumpy when hungry, plan for it early.
Value for Money: Why This Price Makes Sense
At $42.59 per person, you’re paying for several things you’d otherwise spend time coordinating yourself:
- Air-conditioned vehicle
- hotel pickup and drop-off in included areas
- a guided route across multiple villages
- free admission tickets for the stop activities listed
The max group size of 14 people also matters. Smaller groups generally mean less chaos at parking stops and more chance the guide can keep everyone together.
What you’re not buying here is a long museum-style experience. Instead, you’re buying efficient coastal sampling, which can be a great value if your goal is to understand Madeira’s variety in one day.
Weather Matters (A Lot)
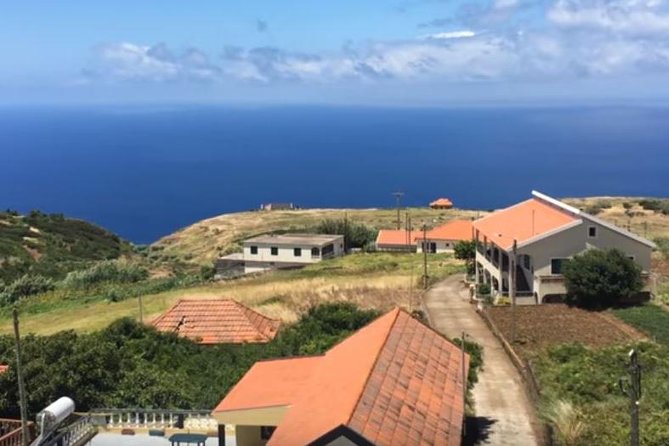
This tour requires good weather. If conditions aren’t right, it may be canceled and you’ll be offered a different date or a full refund.
That’s not a minor detail. You’re traveling along cliffs and exposed coastline, and the driving route plus walking portions will feel very different in wind or heavy rain. If your trip dates are flexible, choose days with better forecasts.
Who This Tour Fits Best
This is ideal for you if:
- you want a guided way to see several southwest villages without logistics stress
- you prefer short walks over long hikes
- you’d like English-speaking narration while you move between scenic areas
- you want a small-group day that’s still efficient
It may feel less perfect if you want deep, hours-long exploration of just one town, or if you’re hoping lunch is handled for you.
A Note on Guides and the Extra Details
Some departures can be guided by Bruno. In at least one highlighted example, the guiding style included local context beyond just stop names, including references to banana levas and a coffee stop on the day’s rhythm.
You shouldn’t assume every departure includes the exact same add-ons, but it’s a good sign: the tour isn’t only about driving and taking photos. A good guide helps you connect what you see—banana-growing hills, fishing-town coastlines, and the practical reasons behind sea-wall history.
Should You Book This Fishing Villages – Southwest Tour?
Book it if you want a smooth, low-effort coastal day that mixes fishing-village character with farmland viewpoints and sea history. The pickup, small group size, and free-entry stop format make it a practical choice for a first or mid-trip Madeira day.
Skip it (or choose another style of tour) if you’re the type who needs long time in one place to fully enjoy it, or if lunch plans are a deal-breaker for you. Since lunch isn’t included and timing can be approximate, treat this as a sightseeing sampler rather than an all-in-one day with meals and long stopovers.
If your main goal is to see Madeira’s southwest without the headache of driving between towns, this is a solid bet.
FAQ
What time does the tour start?
It starts at 8:30 am.
Where do you meet for pickup?
You meet at your hotel reception if possible. If your accommodation is not a hotel, you wait outside by the main entrance.
Is hotel pickup included?
Yes. Pickup and drop-off are included in Funchal, Caniço, Câmara de Lobos village, and Cabo Gírao areas (and the tour notes that Funchal and Canico areas are covered).
Is lunch included?
No. Lunch is not included.
How long is the tour?
It’s listed at about 8 hours, and each stop is scheduled for around 30 minutes.
What language is the tour offered in?
The tour is offered in English.
What happens if the weather is bad?
The experience requires good weather. If it’s canceled due to poor weather, you’ll be offered a different date or a full refund.